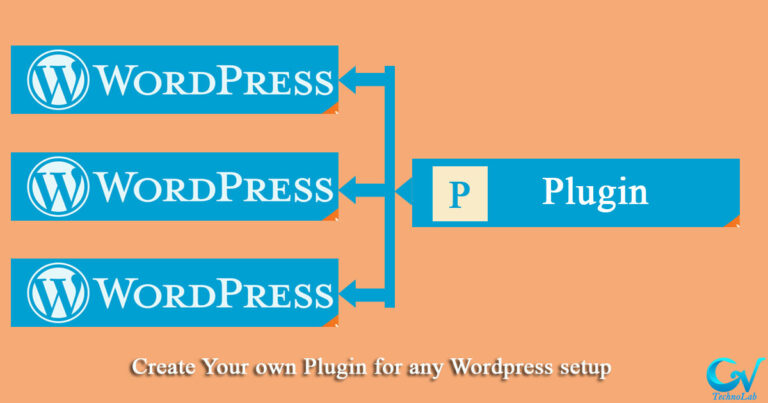
WordPress is a versatile and powerful platform that owes much of its functionality to its extensive ecosystem of plugins. These plugins enhance and extend the capabilities of your WordPress website, allowing you to tailor it to your specific needs.so lets learn How to Create an Addon Plugin in WordPress
If don’t know how to create a WordPress plugin please checkout our blog post here.
In this guide, we will walk you through the process of creating an add-on plugin for WordPress, An addon plugin is a plugin that extends the functionality of another plugin. For example, you could create an addon plugin for a contact form plugin that adds new fields to the contact form. Let’s dive in!
Step 1: Define Your Add-On Plugin’s Purpose
Before you start writing code, it’s crucial to define the purpose of your add-on plugin. Determine what feature or functionality you want to enhance or add to your existing plugin or WordPress core. Having a clear vision will help you stay focused and organized throughout the development process.
Step 2: Create a New Directory for Your Addon Plugin
Navigate to the wp-content/plugins directory in your WordPress installation and create a new folder for your add-on plugin. Choose a unique and descriptive name for your folder, as this will serve as your plugin’s identifier.
you can keep it more simple For example, if your plugin is called “My Addon Plugin”, the folder name should be “my-addon-plugin”.
Step 3: Create the Main Plugin File
Inside your newly created plugin folder, create a PHP file with the same name as your folder. This will be your main plugin file. This file should contain the plugin header, which includes metadata about your plugin such as its name, description, version, author, and more. Here’s an example of what the header might look like:
<?php

// Plugin Name: My Addon Plugin
// Plugin URI: https://www.example.com/my-addon-plugin/
// Description: Enhances the functionality of [Parent Plugin Name].
// Version: 1.0.0
// Author: Your Name
// Author URI: https://www.example.com/


if ( ! defined( 'ABSPATH' ) ) {
	exit; // Exit if accessed directly.
}

function gvt_plugin_prefix_addon() {

    /**
    * Define required constants
    */
    define('GVT_PREFIX__FILE__', __FILE__);
    // Load plugin file
	require_once( __DIR__ . '/includes/plugin.php' );

}
add_action( 'plugins_loaded', 'gvt_plugin_prefix_addon' );
Step 4: Write Your Plugin Code
Now comes the exciting part – writing your plugin code! You can use hooks, filters, and functions provided by WordPress to achieve your desired functionality. If your add-on is intended to enhance an existing plugin, make sure you are familiar with the parent plugin’s documentation to understand the available hooks and functions.
The next step is to write the code for your addon plugin. This code will extend the functionality of the other plugin. The specific code you need to write will depend on the functionality you want to add to the other plugin. However, there are some common things you will need to do.
First, you will need to include the other plugin’s files based on set condition of parent plugin hooked like following code example. in this example we have dependency to woo commerce plugin you can set it as per your requirements.
<?php
/**
 * Your addon Plugin.
 */
defined('ABSPATH') || exit;
/**
 * Class Your_Addon_Plugin
 */
class Your_Addon_Plugin
{
    /**
     * Holds the values to be used in the fields callbacks
     */
    private $options;
    private $plugin_options;

    /**
     * Instance.
     * Holds the plugin instance.
     *
     * @since 1.0.0
     * @access public
     * @static
     */
    public static $instance = null;

    /**
     * Instance.
     * Ensures only one instance of the plugin class is loaded or can be loaded.
     * @since 1.0.0
     * @access public
     * @return Your_Addon_Plugin An instance of the class.
     */
    public static function instance()
    {
        if (is_null(self::$instance)) {
            self::$instance = new self(true);
        }

        return self::$instance;
    }

    /**
     * constructor.
     */
    public function __construct()
    {
        if ($this->is_compatible()) {
            register_activation_hook(GVT_PREFIX__FILE__, array($this, 'prefix_on_install'));
            register_deactivation_hook(GVT_PREFIX__FILE__, array($this, 'prefix_on_deactivate'));

            add_action('init', [$this, 'init'], 0);
            // Your logic will start here on inside init function
        }
    }


	/**
	 * Compatibility Checks
	 *
	 * Checks whether the site meets the addon requirement.
	 *
	 * @since 1.0.0
	 * @access public
	 */
	public function is_compatible()
	{
		// Check if Woocommerce installed and activated
		if(!in_array('woocommerce/woocommerce.php', apply_filters('active_plugins', get_option('active_plugins')))){
			add_action('admin_notices', [$this, 'prefix_admin_notice_missing_main_plugin']);
			return false;
		}

		return true;
	}

  	/**
	 * Admin notice
	 *
	 * Warning when the site doesn't have Woocommerce installed or activated.
	 *
	 * @since 1.0.0
	 * @access public
	 */
	public function prefix_admin_notice_missing_main_plugin()
	{

		if (isset($_GET['activate']))
			unset($_GET['activate']);

		$message = sprintf(
			/* translators: 1: Plugin name 2: Skyfinity Quick Checkout */
			esc_html__('"%1$s" requires "%2$s" to be installed and activated.', 'textdomain'),
			'<strong>' . esc_html__('Your Addon Plugin', 'textdomain') . '</strong>',
			'<strong>' . esc_html__('Woocommerce', 'textdomain') . '</strong>'
		);

		printf('<div class="notice notice-warning is-dismissible"><p>%1$s</p></div>', $message);

	}
	 /**
     * Initializes the Plugin files
     */
    public function init()
    {
      // init your addon plugin code
    }
}
Second, you will need to define some hooks. Hooks are events that WordPress fires when certain things happen. By defining hooks, you can tell WordPress to run your code when those events happen.
Third, you will need to write the code that will be executed when the hooks are triggered.
Step 5: Test Your Add-On Plugin
Testing is a critical phase of plugin development. Activate your add-on plugin and thoroughly test it in various scenarios. Check for conflicts with other plugins or themes and ensure that your plugin performs as expected. Debug any issues that arise during testing.
Step 7: Documentation
Well-documented code is a gift to your future self and other developers who might work on your plugin. Provide clear comments within your code to explain its purpose and functionality. Additionally, consider creating a README text file for your plugin. This file should include information about how to install, configure, and use your add-on plugin.
Step 8: Sanitize code
Before deployment or give it publicly you should go through your all code line by line and follow the rules of plugin development defined by WordPress it self. so that only standard code will be allowed. here are some link you will need to preferred.
https://developer.wordpress.org/plugins/wordpress-org/detailed-plugin-guidelines/
https://developer.wordpress.org/plugins/internationalization/how-to-internationalize-your-plugin/#text-domains
https://developer.wordpress.org/apis/security/sanitizing/
https://developer.wordpress.org/apis/security/escaping/
Step 8: Packaging and Deployment
Once your add-on plugin is thoroughly tested and documented and Sanitized, it’s time to package it for deployment. Create a ZIP file of your plugin folder and give it a meaningful name. You can then upload this ZIP file to the WordPress plugin repository, if desired, or distribute it through other channels.
Creating an add-on plugin for WordPress is a rewarding experience that allows you to customize and enhance the functionality of your website. By following these steps, you can develop a high-quality add-on plugin that seamlessly integrates with existing plugins or the WordPress core. Remember, practice makes perfect, so don’t hesitate to experiment and iterate as you become more skilled in WordPress plugin development. Your contributions to the WordPress community will undoubtedly make the platform even more powerful and flexible for everyone. Happy coding!